Tuesday, December 13, 2016

This semester, I have learned so much. It is difficult to encapsulate all that I have learned. I have a higher caffeine tolerance, I am entirely disenchanted with chicken, I can handle a knife without cutting myself, etc. All in all though, my love for food is the same. I would be lying if I said this semester was easy for me. It was challenging, difficult, and at times discouraging. Yet, the passion I have for food and food photography only grows stronger. I am sad to leave this classroom, yet excited and eager for what the future may bring. 
Even more, I have now received a line cook position at Pizzeria 712 that I am so excited for! My interview consisted of cutting vegetables, and I was grateful for this class and the knowledge I have gained in order to do well in this interview. I feel like things are coming together. I am moving forward in the culinary program with good grades, I now will be working with a wood-fired oven, the Northwest is so close in my future, I am ever eager to continue growing and learning. 
Thank you, chef John, for all your teaching! 


Monday, December 12, 2016

Braising (Combination Method) Recipe:

Thomas Jefferson's Chicken Fricassee
 ready in: 1-2 hrs
serves/makes:   6
INGREDIENTS:
3 pounds chicken pieces
1 teaspoon salt
1/2 teaspoon ground nutmeg
1/2 teaspoon black pepper
1/2 teaspoon paprika
3 tablespoons all-purpose flour
2 cups water
1 cup dry wine
3 tablespoons butter
1 onion, chopped
2 cups fresh small mushrooms
1 tablespoon chopped fresh sage
1 tablespoon chopped fresh parsley
1 cup half and half cream
hot cooked rice
DIRECTIONS:

Wash and dry the chicken pieces. Sprinkle with salt, pepper, nutmeg and paprika.

Brown the chicken in hot oil over high heat in a Dutch oven; remove the chicken when well browned. Reduce heat to medium, add flour, and cook the flour until lightly browned, stirring constantly. Whisk in water and wine until smooth.

Return the chicken to the Dutch oven; bring to a boil. Cover and reduce heat to a simmer. Cook 50 minutes.

Remove chicken, keeping warm, reserve broth in large container. Broth may be strained to remove particles.

Melt butter in Dutch oven, over medium high heat, add onion, cook until lightly browned. Add mushrooms, sage and parsley. Add broth, and chicken. Cook over medium heat, stirring until thoroughly heated. Served over rice.


This was a favorite of mine. Though the combination method is more time consuming, it truly is a delicious one! 

Holiday Gathering


This is the last video I am including in this blog. I feel, because the holidays are here, this is especially pertinent. This video, although simple, reminds me of the importance of family, the gift of food, and of gathering at the dinner table to make connections with one another over a well-prepared meal. 

Event Chronicles


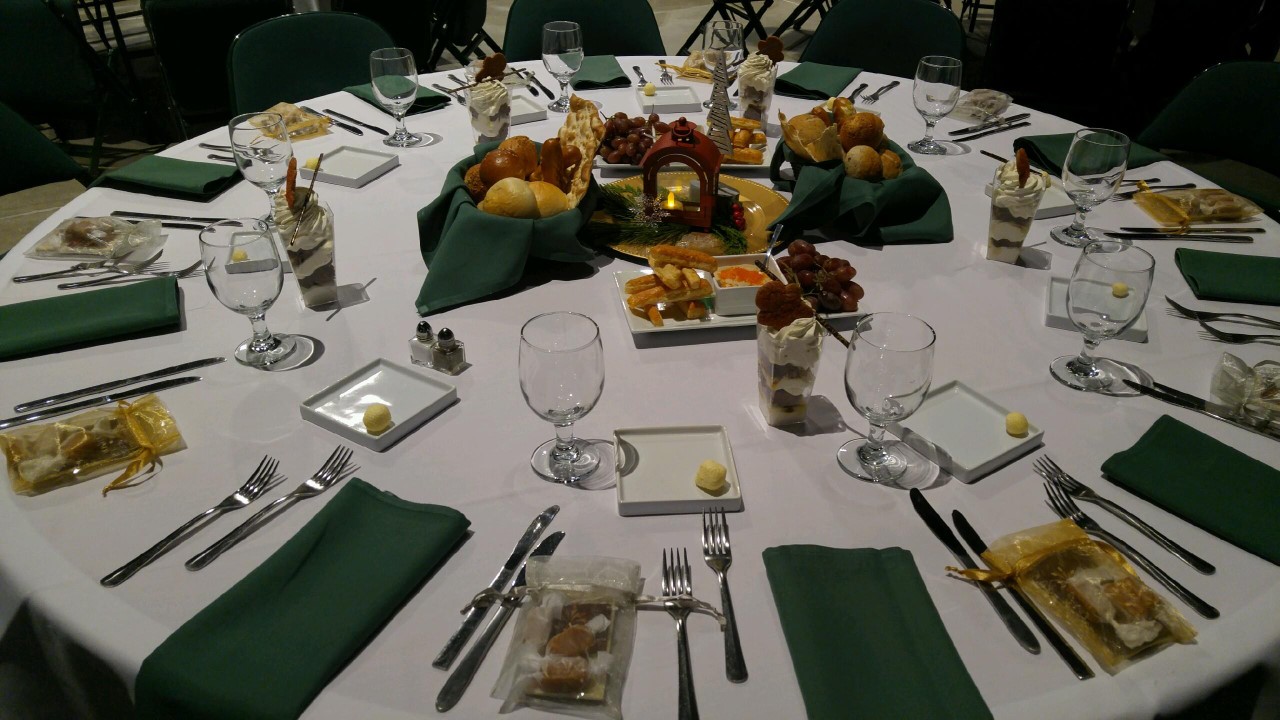
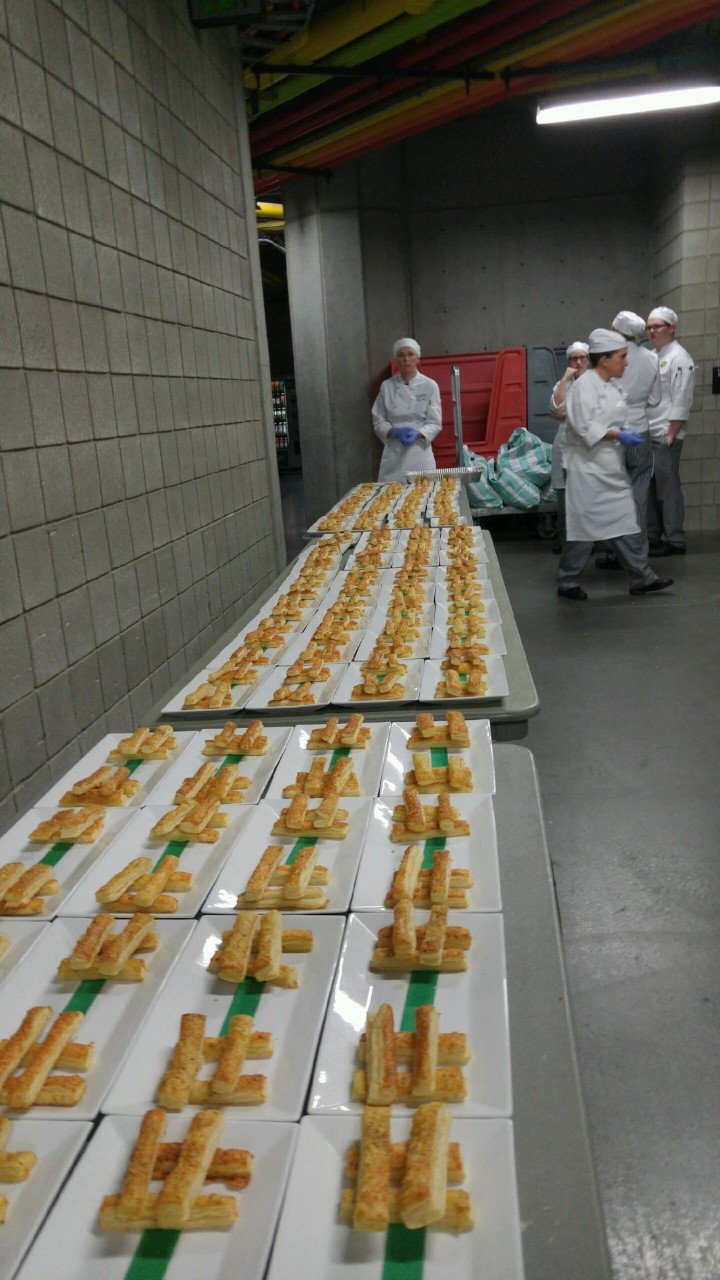
Throughout this block, we have had many catering events. With three Elder Quests lunch catering events, to NuSkin, US Synthetics, and Doterra, this block has been filled with a lot of planning and hard work. I have learned many things during these catering events, such as the virtue of flexibility. As an individual who takes pride in organization and planning, I have found this difficult for me adjust to. Many days I have felt unorganized and frustrated. Yet, I have found that this is simply the art and reality of the food industry. I have found, and learned this countless times throughout this semester alone. It is something I am adjusting to. It is something I am practicing being okay with. Something that I hope, one day, I can learn to be successful with despite the confusion and chaos I may feel. This class alone has been a learning experience for me in that the food industry can throw you curve balls that one will have to successfully hit despite any original plans. What matters most is the food. The mentality to make good food and provide well for your guests, despite unforeseen obligations, will always trump any previously made plans or intentions.  I have also learned throughout this semester the importance of reliability, of doing your best, and of working as hard as you can until your hands and feet are dirty, and continuing to work hard long after that. Although many photos of these catering events are not included, the ones that are show a bit of the hard work, and fun we put into these events. 

Otium: The Artisan Story


Timothy Hollingsworth, chef and owner of Otium restaurant located in Los Angeles, places great emphasis on supporting local purveyors, artisans, and craftsman, encouraging artists to gather together and collaborate with one another. Upon opening his first solo project, Otium, Hollingsworth releases control and allows local artisans the ability to do what they do, in their own creative space, throughout the construction of his new restaurant. This video, among many on my blog, is considered one of my favorites. Hollingsworth, in relinquishing control, allows artists to do their craft, and in doing so finds that these artists want to come back and collaborate with him. This is where food meets community. 

"I think it's funny when you let go of control, and you allow different people who are passionate about what they do, do what they do; bringing together people that are good at what they do, allowing them to have their own creative space and collaborate with you, is only going to only make you better." 
-Timothy Hollingsworth 

Breakfast Cookery


Breakfast cookery. Seems like an easy task, right? No, no it's not. Below are critical control points for breakfast items (yes those exist, I know), as well as the methods for them as well. 

•Egg Cookery Critical Control Points: When cooking with eggs for breakfast items, it is important to use the freshest Grade AA eggs whenever possible for best results. Fresh, Grade AA eggs maintain their shape best because the yolks and whites are still firm. Grade B is best used as an ingredient, such as in a baking. When poaching eggs, if the eggs are not fresh, add 1 teaspoon salt and 1 tablespoon distilled vinegar per quart of water to help coagulate the egg whites faster in order to hold better shape. Water temperature for poached eggs, must be at a simmer. If the water is boiling, the eggs will become tough, and may be broken by the agitation. If water is not hot enough, however, eggs will not cook quickly enough, and will spread. 
When frying eggs, add just enough fat to lubricate the pan. However, do not add more than necessary as this will cause the eggs to become greasy. Not enough, though, will cause them sot stick to the pan. Use Grade AA eggs for fried eggs. 
When making scrambled eggs, use a stainless steel bowl to beat the eggs. Do not use aluminum as this may discolor the eggs. Over the right degree of heat, stir gently as the eggs coagulate, yet take care, as too much stirring breaks up the eggs into very small particles. Do not let the eggs brown. KEEP HEAT LOW. 
When making omelets, two elements are necessary. As a contradiction to many egg cooking procedures, for omelets, the heat must be moderately high. An omelet cooks so fast that its internal temperature never has time to get too high. A critical control point as well, is using a conditioned omelet pan. The pan must first, have sloping sides, and also be the right size so the omelet may be shaped properly. It also must be well seasoned or conditioned to avoid sticking. The most common errors for making omelets as well, is not shaking or stirring vigorously enough and using heat that is too low, as the purpose of this is to keep the eggs in motion in order for them to coagulate uniformly. 

For all eggs, apart from using the freshest & best quality eggs, use the correct amount of heat (low, unless for omelets), never hold cooked eggs for too long as this will change the color of the eggs, and never overcook, as this will result in a green colored egg as well. 

•Muffin Method Critical Control Points (Pancakes): Critical control points when working with the muffin method is that the dough can quickly become over-mixed resulting in toughness and tunneling of the pancakes. Pancake batter should be mixed only until the dry ingredients have been moistened rather than attempted to achieve a smooth mixture. After proper combining of all mixtures, the batter should also be baked immediately or loss of volume may result.

•French Toast & Crepes: A critical control point when making French Toast is insuring the bread is soaked long enough to allow the batter to penetrate the bread. If not done, the final product is simply dry bread with egg on the outside. However, do not soak the bread so long that it falls apart. French toast should also be cooked correctly, and only until the bread has browned lightly on each side. 
A critical control point for crepes, is to allow the batter to sit for the approximated time before cooking, and also completely coating the bottom of the pan evenly to cook correctly and most attractively. 

Methods: 
•Poached Eggs: To poach eggs, bring water to a simmer. (If water is boiling, eggs will toughen and may be broken up by the agitation, if water is not hot enough, eggs will not cook quickly enough and will spread). If desired, one at a time, break eggs into a dish or a small plate and slide into the simmering water. Simmer 3-5 minutes, or until the whites of the egg have coagulated with yolks still soft. Remove eggs from the pan with a slotted spoon, and serve immediately. 

•Over Easy Eggs: To fry eggs, add 1/8 inch of fat (too much fat will cause the gas to become greasy, not enough will cause them to stick) to the sauté pan and set it over moderate heat. When the fat has become hot enough, slide the eggs into the pan, reduce the heat to low, and cook the eggs as indicated. For over easy eggs, fry and flip over. Cook just until the white as set, but the yolk is still liquid. 

•Scrambled Eggs: Break eggs into a stainless-steel bowl and beat until well blended. Season with salt and pepper, and if desired, add a small amount of milk or cream if desired. Too much liquid may make cooked eggs watery, and dilutes flavor. Heat butter in a small sauté pan. As for fried eggs, once the fat is hot enough, pour in the eggs, and cook over low heat, stirring gently from time to time as the eggs coagulate. When eggs have become set, yet still soft and moist, remove from the heat and plate. 

•American & French Omelets: Beat two or three eggs in a small bowl until well mixed, and season with salt and pepper. If desired, add a small amount of milk to lighten the omelet. Over moderately high heat, coat the pan with clarified butter and add the eggs to the pan. With one hand, vigorously shake the pan back and forth whilst also stirring the eggs with a circular motion. Once the eggs are almost set, yet still soft, stop shaking and stirring, tilt the pan and flip. For a filled omelet, spoon the filling across the center of the egg (on top for French, in the omelet for American). Fold the sides of the omelet as directed (for French, fold three times, for American fold once). Tilt the omelet out onto a plate so it keeps it shape, and serve. 

•Pancake Batter: The muffin method is fast, easy, and is generally used for muffins, pancakes, waffles, and a number of loaf-type or sheet-type quick breads. Key points in this method, as previously discussed, are avoiding over-mixing when combining all ingredients together, as well as quickly baking them once combined to avoid volume loss.

•French Toast: For French Toast, beat together the eggs, milk, cream (if included), and any additives such as vanilla, cinnamon, nutmeg, and salt. Soak the bread in the egg mixture until the bread is soaked through. In a large sauté pan, add butter, and place two slices of bread to brown the bottom. Turn the bread, and continue to cook for 30 seconds. Once cooked, plate, dust with powdered sugar, and serve. 

•Crepes: To make crepes, whisk together the eggs and eggs yolks, water, milk, and add sugar, salt and flour. Afterwards, stir in the melted butter. Allow the mixture to rest for at least one hour prior to cooking. For cooking, heat a small sauté or crepe pan and brush lightly with clarified butter. Pour in the recommended amount of batter into the pan, and allow to set until light brown. Flip the creme and cook a few seconds longer. Remove from the pan, plate, and serve. 

•Hollandaise Sauce: To begin, add the egg yolks and water to a stainless-steel bowl and beat well. Hold the bowl over a hot-water bath (similar to a double boiler) and continue to beat until the yolks have thickened and become creamy. Once ribboned, remove the bowl from the heat, and, using a ladle, slowly and gradually beat in warm clarified butter, drop by drop. Once the butter is added, beat in lemon juice to taste and adjust seasoning with salt and cayenne pepper. Hollandaise sauce may also be strained through a cheesecloth if necessary. Again, serve immediately and if not, hold no longer than two hours.

•Hash Brown Potatoes: Chop the potatoes into small pieces. Boil until slightly softened. In a sauté pan, ladle a thin layer of oil or butter into a well-seasoned 6 inch sauté pan and set it over high heat. When the fat is hot, add potatoes sauté until well browned browned, including any additives such as onions, peppers, ham, etc. 

Basic Rice Pilaf Recipe

RECIPE: Basic Rice Pilaf
CHEF: J Thomas YIELD: 4-6 Servings

Ingredients
1 tablespoon olive oil / clarified butter
1 cup small diced onions
Salt and freshly ground white pepper to taste
1 teaspoon chopped garlic
1 cup long-grain rice
2 cups chicken stock, hot
1 tablespoon butter
1/4 cup grated parmesan cheese
2 tablespoons finely chopped fresh parsley leaves
Directions
In a large sauté pan, over medium heat, add the oil and heat. When the oil is hot, add the onions, season with salt and pepper and sauté until the onions are slightly soft (no caramelization), about 3 minutes. Add the garlic and cook for 30 seconds. Add the rice and sauté only until the rice is coated with the oil. Do not let rice sauté more than 30-45 seconds or your rice will be tough. Add the stock and bring up to a simmer without stirring other than getting the rice and stock mixed. Immediately cover pot tightly and place in a 350 degree oven. Let the rice cook for 17-20 minutes. Using a dry rag as a pot holder, pull pan from stove and fluff rice with a fork. Taste for seasoning and doneness. If still al dente, add a small amount of liquid (if it has all been absorbed) and allow to cook for another 2-3 minutes.  Add any other cooked garnish to the mixture if desired. It should take about 20 minutes to incorporate all of the stock and rice is tender. Stir in the butter and cheese. Serve pilaf as desired. Garnish with parsley.


Yield: 4 to 6 servings

Starches: Risotto & Pilaf


It was not until this class that I learned that both risotto and pilaf, are not recipes, but methods. Though it wasn't easy for me in the beginning, I now enjoy making these dishes both at school and at home! Below, I have included the critical control points for both, as well as their methods.

•Basic Risotto Critical Control Points: When making Risotto, onions must be cooked until they have simply sweated, otherwise a bitter taste my result in the final product (something I learned the hard way). Rice must also also be coated in the fat prior to any addition of liquid. When adding chicken stock, (or other desired hot liquid) only a small amount may be included each time and cooked slowly, until the liquid has been absorbed by the grain (and not before!) This process must be repeated three times, until the grain has become tender, yet STILL firm. Risotto should be moist and creamy, yet not runny.

Basic Rice Pilaf Critical Control Points: When making rice pilaf, onions must be cooked until they have simply sweated, otherwise a bitter taste my result in the final product (something I learned the hard way through risotto the previous day). Rice must also also be coated in the fat prior to any addition of liquid. When adding chicken stock, (or other desired hot liquid) only enough to cover the rice may be included each time and cooked slowly in the oven for about twenty minutes, until the liquid has been absorbed by the grain (and not before!). If the liquid has been absorbed before the rice has completely cooked, it is important to add more stock and continue cooking until the grain has become tender, yet still firm, similar to risotto. 

Methods: 
•Basic Risotto: Heat the desired fat (i.e. clarified butter, or oil) in a heavy pan, and add chopped onion or other aromatic vegetable, and sauté until soft, yet not browned. Add the grain, and store to coat the grains with the fat. Add a small amount of hot liquid (in this case, we used chicken stock), and cook slowly, stirring, until the liquid has been absorbed by the grain. Repeating this same procedure, add the second quantity of liquid and cook until it has again been absorbed by the grain. Repeat a third time and stop adding liquid when the grain has become tender, yet still firm. 

•Basic Rice Pilaf: The pilaf method is considered equivalent to the braising method. The grain is first sautéed in fat, and then cooked in liquid  (in the oven for uniform heating), until the liquid has absorbed. To begin, heat the desired fat, such as butter or oil, in a have pan, and add chopped onion or other aromatic vegetable of choice, and sauté until soft, yet not brown. Add the grain, and stir to coat the grains with fat. Cook the grain in the fat, and toast lightly. Following this, add the proper amount of hot liquid, and bring to a simmer. Cover tightly, and place in the oven for the correct amount of time—this may depend on the grain being used. Once done, remove from the heat and let stand, covered, in order to allow the moisture to be absorbed uniformly by the grain. Add any addition inclusions, if any. As a class, we included parmesan cheese, parsley, and butter. 


Bad Ass Aprons by Hedley & Bennett


Ellen Bennett, CEO and founder of Hedley & Bennett, discusses apron artistry and her journey to outfitting a number of cooks in restaurants across the United States. Just like in the kitchen, Hedley & Bennett uses the best ingredients in the world to handcraft aprons, with over 15 different artisans at the wheel. Hedley & Bennett displays passion for not only the food industry, but for the potters and painters as well, promoting all artists from their Los Angeles headquarters. 

Fish Cookery: Dry & Moist Heat Methods


Cooking fish really is no simple task. Almost all of these pictured above were overcooked. It really is so easy to do! I'm hoping throughout the rest of my schooling, and career, I become more efficient at cooking delicate pieces of fish. Included below are the critical control points for fish cookery, as well as the methods. 


•Critical Control Points for Sautéing Fish: Lean fish are well suited for sautéing due to the fat supplied by the cooking method, which the fish naturally lacks. Clarified butter, rather than whole butter which is likely to burn, should be used for sautéing, however only a minimum of about 1/8 inch of fat should be used simply to coat the bottom of the pan. Following basic sautéing guidelines, insure the pan is hot in order to avoid having the fish stick to the pan, and brown the presentation side (skin side) first. Overcooking is the most common mistake when working with fish, therefore sautéing (and all cooking methods) should be done so with care. Once cooked, hand the fish carefully to avoid breaking the fish or the crisp crust, and always serve immediately as the quality will deteriorate if held too long.

 •Critical Control Points for Cooking Fish: Because most fish and shellfish have little connective tissues, procedures for cooking them are somewhat different from cooking meats and poultry. Unlike cooking meats and poultry, which main concern is to tenderize the product, fish is naturally tender, and thus cooking (more importantly overcooking) toughens and dries out the product. To cook fish properly, use the right method for the right kind of fish (i.e. fat fish is best for broiling, lean fish is better for sautéing). Cook the fish until it just begins to flake, and no longer or the fish will quickly become overcooked. Cooking to correct temperatures, using correct technique, and paying attention are critical when handling fish. Additionally, like all food products, fish should be purchased from approved, reputable suppliers. 


Methods: 
•Trout a la Meuniere: To begin, season the fish and dredge in flour (shake of excess), and place the fillet in a hot buttered pan, presentation side down. Quickly sauté the fish, turning once with a spatula until both sides are browed and the fish as been thoroughly cooked. Once the fish has been removed from the pan, add butter, white wine, shallots, and parsley until a light sauce has been made. Serve atop the fish.

•Pan-Fried Fish Fillets: After being stripped of any pin bones, all trout fillets are placed in the prepared breading station (including flour, egg wash, and breadcrumbs) and placed presentation-side down in hot oil taking care to avoid splashing yourself with hot oil in the process. The outside must be fried until golden brown, and with tongs, turned to brown the opposite side. Following this procedure, the heat must be lowered to avoid over-browning, and fillets must be allowed to continually cook (turning occasionally) until thoroughly cooked. The fillets are then removed from the pan, and drained well.

•Deep-Fried Fillets: Following the breading station procedure (i.e. flour, egg wash, and crumbs), fillets are simply placed in a deep fryer at the proper temperature (325º-350ºF), and cooked until golden browned and thoroughly cooked. Remove from the fat, and drain well. Fillets may be placed in the oven to continue cooking if the breading turns the desired color before the fish has cooked thoroughly. This should be done with care however, as fish is extremely easy to overcook. 

•Broiled Fillets: Season all fillets with salt and pepper and/or additional desired seasonings. Place the presentation-side down on a broiler rack, and broil at a high heat temperature until the fillet is half cooked and well browned on one side. Flip the fish over with the proper cooking utensil and repeat the process. Fish should continue to broil until completely cooked on the both sides. Remove from the broiler, and if being served, serve immediately.

•Fish Fillets en Papillote: Prior to preparing Sole en Papillote, first begin through the making of en papillote wrap. Once complete, butter the parchment paper, and add the seasoned sole fillets. In addition, include any vegetables you may wish. (Personally, I included two citrus wheels, shallots, garlic, julienne carrots, and thyme). 

•Chicken and Smoked Sausage Gumbo (Made w/ Trout): When preparing Gumbo, to begin, add any meat such as trout or sausage in a pan with fat and cook until well browned (unlike chicken, this must be done closer to serving time, and done with more care in order to avoid overcooking the fish). Remove from the pan. Once complete, add any vegetables called for such as onions, celery, bell peppers, and cook thoroughly until slightly wilted. Add the reserved meat and season according to specifications. Add any liquid such as chicken stock and cook until well combined. Bring the mixture to a boil, and reduce the heat to medium-low and cook, uncovered for up to one hour, stirring occasionally. Serve over rice with a side of hot sauce if desired.

Flat Fish Butchery


Below are the critical control points, as well as the method for flat fish butchery. Did I forget to mention wearing gloves?

•Fish Fabrication Critical Control Points: When working with fish, critical control points may include purchasing a fish from a reputable supplier first and foremost. Keeping all equipment properly sanitized is essential before beginning any preparation of raw fish (and after). When fabricating a round and flat fish such as trout and sole, it is important to use clean and sanitized equipment, and have all mise en place in place. Knowing the bone structure of the fish is important knowledge in order to correctly cut up the fish, and should be practiced often in order to properly execute. When cutting fish, it is important to use as much meat as possible, and leave the fish boneless (if required) and void of any pin bones. This should be done with care in order to avoid leaving any undesirable pieces behind that may be considered a physical contaminant.

Methods: 
•Flat Fish Fabrication: To begin, with kitchen sheers, cut on both sides of the fish to remove fins. Afterwards, make a cut from head to tail just to one side of the center line, down to the backbone. As you turn the knife almost parallel to the table, make a long, smooth cut horizontally against the backbone toward the outer edge of the fish in order to separate the fillet from the bone. Remove the fillet completely, and repeat to remove the three remaining fillets. Once complete, skin the fillet. Like round fish, to do this simply place the fillet skin side down with the tail pointing toward you. Holding the skin at the tail end, slide the knife between the skin and flesh, scraping against the skin to avoid cutting into the fillet. 

Fish Fumet Recipe

RECIPE: Fish Fumet
CHEF: J Thomas YIELD: 1 gallon

Ingredients
2 cup sliced onion 
6 parsley stems 
5 pounds fish bones (no heads/gills) such as halibut, trout, sole, well rinsed under cold water
1 ½ cup dry white wine or vermouth 
2 tablespoon lemon juice 
6 quarts cold water 
½ cup mushroom trimmings 
1 teaspoon fresh dill leaves 
6 thin slices lemon 
1 each bouquet garni
Directions
Set a 1-gallon stockpot over a medium-heat. Add the onion, parsley and fish bones to the pot with a small amount of water to prevent burning. Sweat the onions, parsley and bones by covering the pot for 5 to 7 minutes. Uncover the pot and add the white wine and lemon juice to the pot. Stir gently and cover with the cold water. Add the remaining items to the stockpot and raise the heat. Bring the contents of the pot to a boil, and reduce to a simmer. Cook the stock for 45 minutes to 1 hour. 
Strain through a chinois and cool the stock in an ice bath. Whatever is not used that day should be refrigerated for up to 1 week, or frozen for up to 3 months.

Yield: about 1 gallon 

Round Fish Butchery


Although, easier and less disgusting that butchering a flat fish, trout was another butchery I wish to make improvements on throughout the culinary program. Below are the critical control points, as well as the method for round fish butchery. 

•Round Fish Fabrication Critical Control Points: When working with round fish, critical control points may include purchasing a fish from a reputable supplier first and foremost. Keeping all equipment properly sanitized is essential before beginning any preparation of raw fish (and after). When fabricating a round fish such as trout, it is important to use clean and sanitized equipment, and have all mise en place in place. Knowing the bone structure of the fish is important knowledge in order to correctly cut up the fish, and should be practiced often in order to properly execute. When cutting fish, it is important to use as much meat as possible, and leave the fish boneless (if required) and void of any pin bones. This should be done with care in order to avoid leaving any undesirable pieces behind that may be considered a physical contaminant. 

Methods:
•Round Fish Fabrication: Cut into the top of the fish along one side of the backbone beginning from head to tail. Cut against the bone with smooth strokes of the knife in order to separate the flesh from the bone towards the tail, and detach it. Turn the fish over, and repeat to remove the second fillet on the other side. Once complete, remove any bones remaining with pliers, and skin the fillet. To do this, place the fillet skin side down with the tail pointing toward you. Holding the skin at the tail end, slide the knife between the skin and flesh, scraping against the skin to avoid cutting into the fillet. 

Otium: Chapter One


Chef Timothy Hollingsworth was awarded the opportunity to represent the United States at the Bocuse d'Or competition in 2008, after which he rose to Chef de Cuisine at the three Michelin star restaurant The French Laundry, located in Napa Valley, CA. 
He has now opened his first solo project, Otium, in Los Angeles. Hollingsworth places great emphasis on family and the importance of the dinner table, as well as supporting local purveyors, artisans, and craftsman, by encouraging artists to gather and collaborate. 

"In my life, there has always been this responsibility of helping others. You are working with different purveyors, you are working with people that are proud about the products that they're making. The responsibility is yours to showcase the product. Understand how it was used, and then utilize it in a way that is fun and exposes people to the product and the culture." -Timothy Hollingsworth 

Restaurant Highlight: The Longman & Eagle

Drinking in Chicago has multiple origins, the most influential and oldest of which is the inn - an establishment that offered drinking, eating and sleeping options.

The history at The Longman & Eagle restaurant, located in Chicago, IL is both colorful and rich, as it was at places such as The Eagle, The Green Tree and The Sauganash where much of the city’s social life revolved in its early years. Longman & Eagle is a look back, reimagining this age-old concept through a contemporary lens, providing urban ‘travelers’ a refuge that appeals to a variety of senses - be they aesthetic, consumptive, culinary or restorative - done in a way that is accessible, considered and innovative. The sort of place where a man can get a shot with breakfast, where local politicians might trade votes for whiskey, and one that reflects Chicago’s unique neighborhood-based diversity.
The first floor features a larger ‘public’ space at the front of the building, one centered around a dramatic bar and back bar coupled with a variety of seating options for drinkers and eaters alike. The backroom ‘snug’ is a slightly more formal space that offers patrons a less raucous dining experience; and is an area that is also occasionally used to host art openings, private parties and other special events. The Off Site Bar – affectionately referred to as ‘The OSB’ - is a tiny micro bar located adjacent to and the rear of the building, accessible as an extension of Longman, or as its own standalone walk-up option. The second floor, in keeping with Chicago’s colorful history of inn culture, features six guest rooms that complement the bar and restaurant below. Each room has been individually designed and furnished with an aesthetic that acknowledges past and present histories alike, at their core offering comfort, design consciousness and subtle luxury. The rooms reflect the same attention to creativity, detail and quality that is the foundation of the bar and restaurant.
In fin de siècle Chicago, bars, inns, pubs and saloons were the principle community centers of their era, where the providing of drink, food and lodging gave patrons and travelers a sense of place that was accessible, appealing and attractive to folks of all stripes, both poor and rich. Longman & Eagle is an attempt to recapture that same spirit, tapping into the essential core of a city that has long been one of the world’s finest.


Soup Production


Soup, although delicious, is something I have found I do not enjoy making throughout this semester. It requires a lot of prep work for simply placing it in a pot and allowing it to cook (and thicken, if necessary). As always, below are critical control points and methods for both thickened and unthickened soups. 

•All Soup Critical Control Points: Puree Soups are made by simply simmering dried or fresh vegetables (typically high-starch vegetables) in stock or water, and then pureeing the soup. Puree soups are slightly coarse in texture, are not as creamy as cream soups, and are slightly thicker. Pureed soups should have color from the main ingredients and pertain predominant flavor of that ingredient, with the flavor of the stock or broth in the background. When adding vegetables in all soups, do not add vegetables that require different cooking times all at once, as this may overcook many vegetables. Vegetables must only be simmered until vegetables are tender, and no more as they should not be overcooked or falling apart. For unthickened soups, start with a clear, flavorful stock or broth. It is important to begin with a clear stock, even though the soup will inevitably be cloudy as the vegetables are typically cooked in the soup. Additionally, selecting vegetables that compliment each other to create a good flavor may be considered a critical control point, as well as cutting all vegetables uniformly not only for an attractive appearance, but for uniform cooking as well. Starches, such as the rice in the Chicken & Rice Soup, should be cooked separately and added to the soup later in order to avoid making the soup cloudy. As always, vegetables in a soup should be tender but firm enough to hold their shape and thus should not be overcooked. 
  Thick soups, unlike clear soups, are opaque rather than transparent. They may be thickened by either adding a thickening agent, such as a roux, or by pureeing ingredients in order to create a heavier consistency. When making cream soups combining milk, cream or both, curdling is a common  problem. To avoid this, critical control points such as using a roux or other starch thickener to stabilize milk and cream, may be done. Additionally do not combine milk and simmering soup stock without the presence of roux or other starch, and do not boil a soup once the milk or cream has been added. When adding vegetables, do not add vegetables that require different cooking times all at once, as this may overcook many vegetables. Additionally, instead of holding soups for an extended period of time, as this will overcook both the meat and vegetables, heat small batches frequently in order to avoid overcooking a soup. 
Additionally, instead of holding soups for an extended period of time, as this will overcook both the meat and vegetables, heat small batches frequently in order to avoid overcooking a soup.

Methods: 
•Cream Soup Base (Cream of Mushroom Soup): To prepare a cream soup such as Cream of Mushroom, a cream soup base must be prepared. This is done by melting butter, and sweating onions until tender, yet not browned. In another pot, a combination of milk and cream must be heated to almost the boiling stage. Following this, the roux must be tempered and added to the hot milk and cream mixture, allowing to simmer until fully incorporated until the desired consistency has been reached. Once complete convert the recipe into a soup with the desired ingredient. In class, we added chopped mushrooms (simmered) to the mixture in order to create a Cream of Mushroom soup. The final product was very nice!

•Corn Chowder: Chowders are chunky, heart soups typically filled with fish/shellfish, vegetables and typically contain potatoes and milk or cream. Corn chowder is quite simple to make, yet takes a fair amount of preparation to begin. Depending on the ingredients required, all vegetables need to be cleaned, cut, and properly prepared prior to being incorporated in the soup. Once preparation is complete, a pot of cream, milk, chicken stock, and any aromatics such as corn cobs, bay leaves, garlic, peppercorns, and thyme may be added. In a separate pot, any meat, roux, and vegetables called for may be cooked lightly in fat before being added to the liquid. Once simmering, any seasonings may also be adjusted or added. 


•Chicken and Smoked Sausage Gumbo:  When preparing Gumbo, to begin, add any meat such as chicken or sausage in a pan with fat and cook until well browned. Remove from the pan. One complete, add any vegetables called for such as onions, celery, bell peppers, and cook thoroughly until wilted. Add the reserved meat and season according to specifications. Add any liquid such as chicken stock and cook until well combined. Bring the mixture to a boil, and reduce the heat to medium-low and cook, uncovered for up to one hour, stirring occasionally. Serve over rice with a side of hot sauce if desired. 

•Puree Soup: Sweat fresh vegetables in fat, and add liquid. Following this, add starchy vegetable and simmer until vegetables are tender (fresh vegetables should be completely cooked but not overcooked or falling apart). Puree Soup in a blender, food mill, or with an immersion blender. If required, add cream and adjust seasonings. 
•Chicken & Rice Soup: To begin, in a large saucepan combine clear, flavorful chicken stock, tomato sauce, fresh parsley & thyme and bring to a boil. Following this, reduce heat and simmer for 20-25 minutes. Add the cooked, shredded chicken and shredded rice, and simmer for 10 minutes. Serve with parmesan cheese garnish. 

Food from Home with Ellen Bennett


Ellen Bennett, CEO and founder of Hedley & Bennett Aprons talks about food, the influence it can have on an individuals life, and the connection it can bring. 

Vegetable Cookery

Sautéed Brussel Sprouts
Ratatouille 

Roasted Vegetables & Pan Gravy
Roasted Vegetable Medley 
 Below are critical control points for all vegetable cookery, although methods may vary. 

•Critical Control Points for Vegetables: Following specific cooking guidelines and principles, and also understanding how cooking may affect particular vegetables, such as texture, flavor, color, and nutrients are critical control points. How much these four characteristics determine the final product and its attractive and delicious attributes (or lack thereof). In addition, achieving proper doneness in vegetables may also be considered a critical control point. Avoiding overcooking is the most important as this very negatively impacts the quality of your dish. Cooking as close to service as possible is yet another critical control point. Additionally, always purchasing fresh produce for approved, reputable suppliers is essential.